3. Add 360° Images & Verify Them
Visual verification is the bridge between data and trust. While Point Clouds provide the geometry, 360° images provide the context, color, and visual "truth" of the site at a specific moment in time.
Integrating these panoramas allows stakeholders to virtually walk the site, inspect finishes, and verify that the work matches the digital model. This step ensures that every data point is backed by a high-resolution visual record, eliminating guesswork and reducing unnecessary site visits.
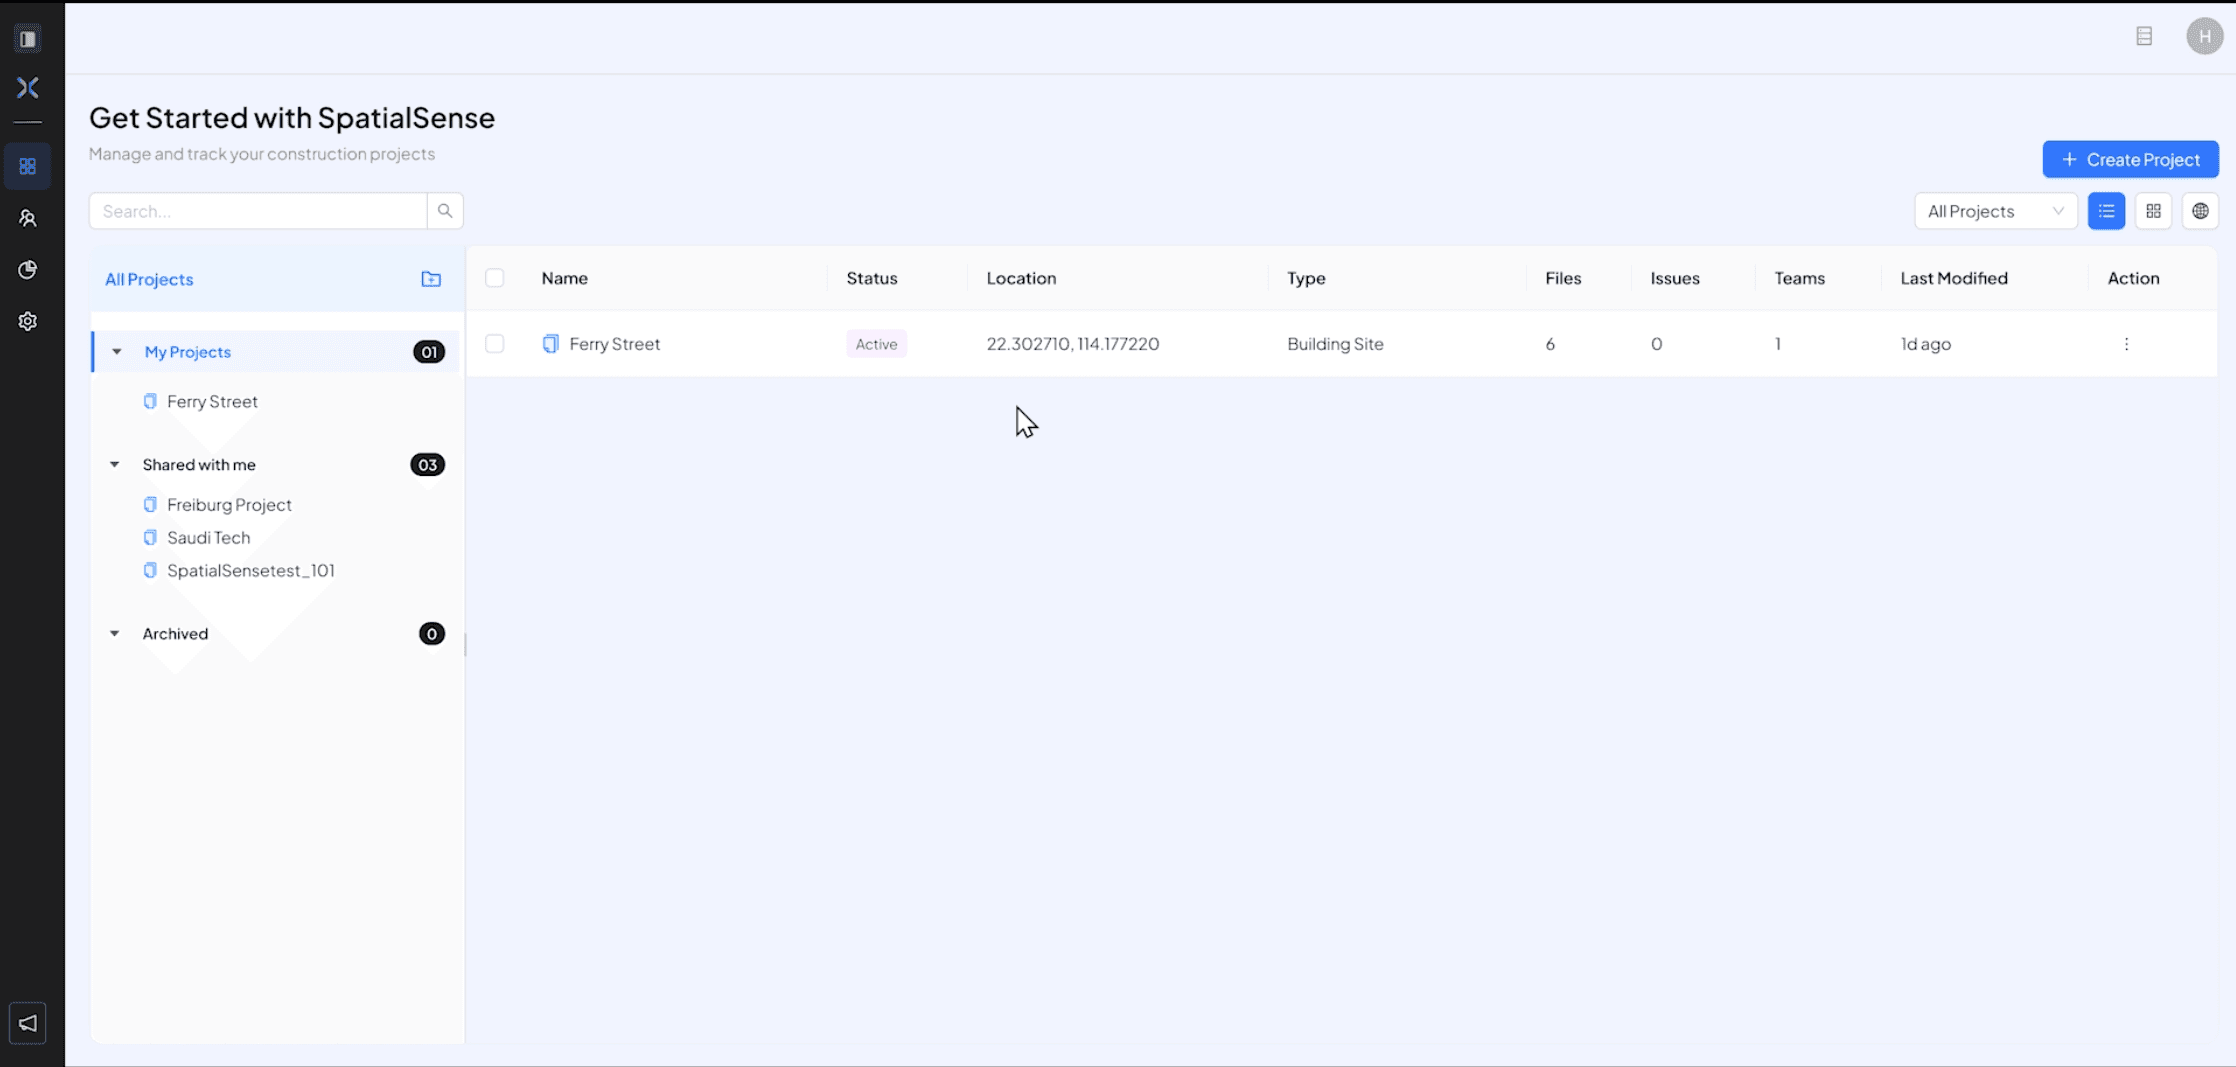
In your project dashboard, either create a new project or add 360° in your existing project
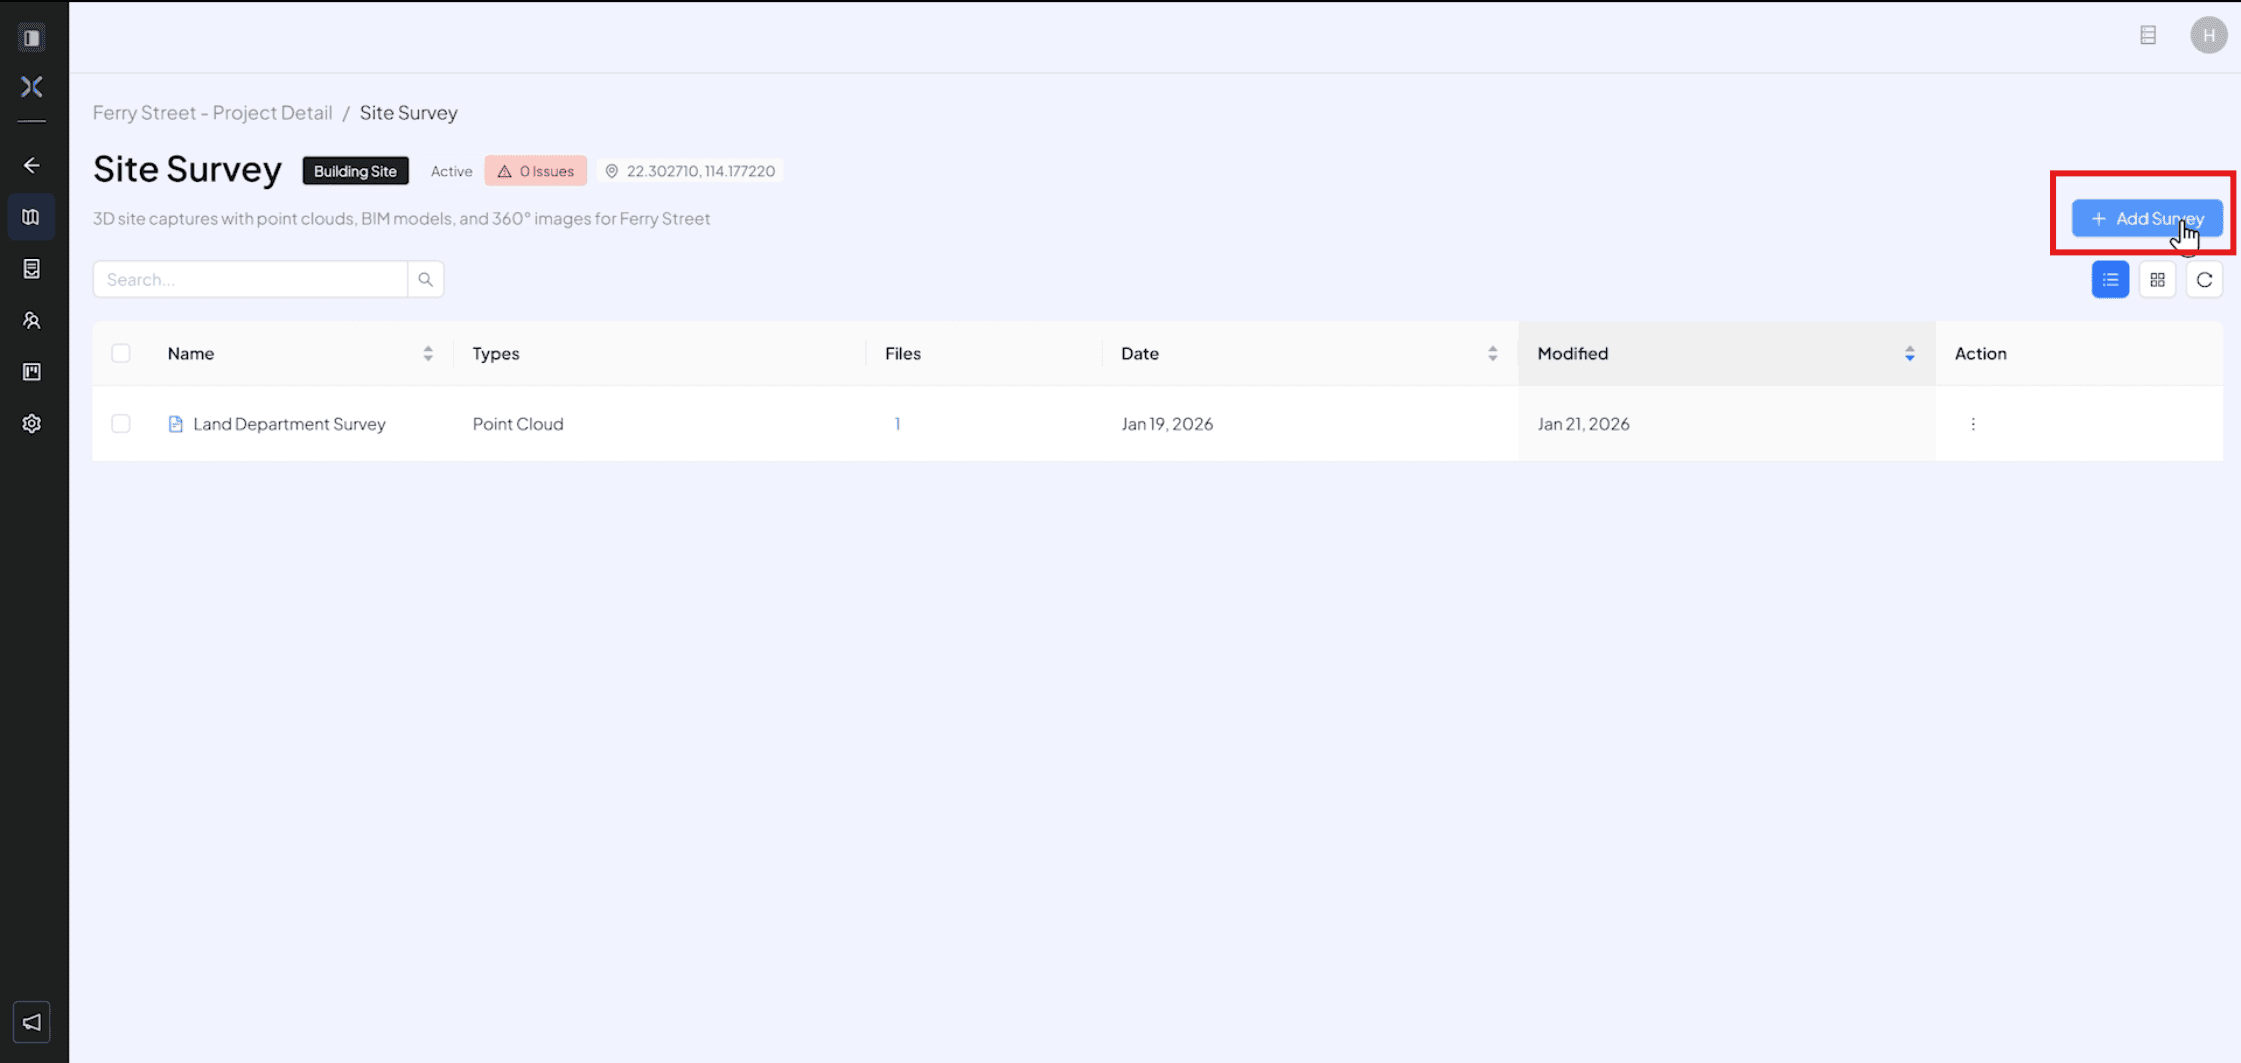
Click on “ Add survey” to survey data for the project
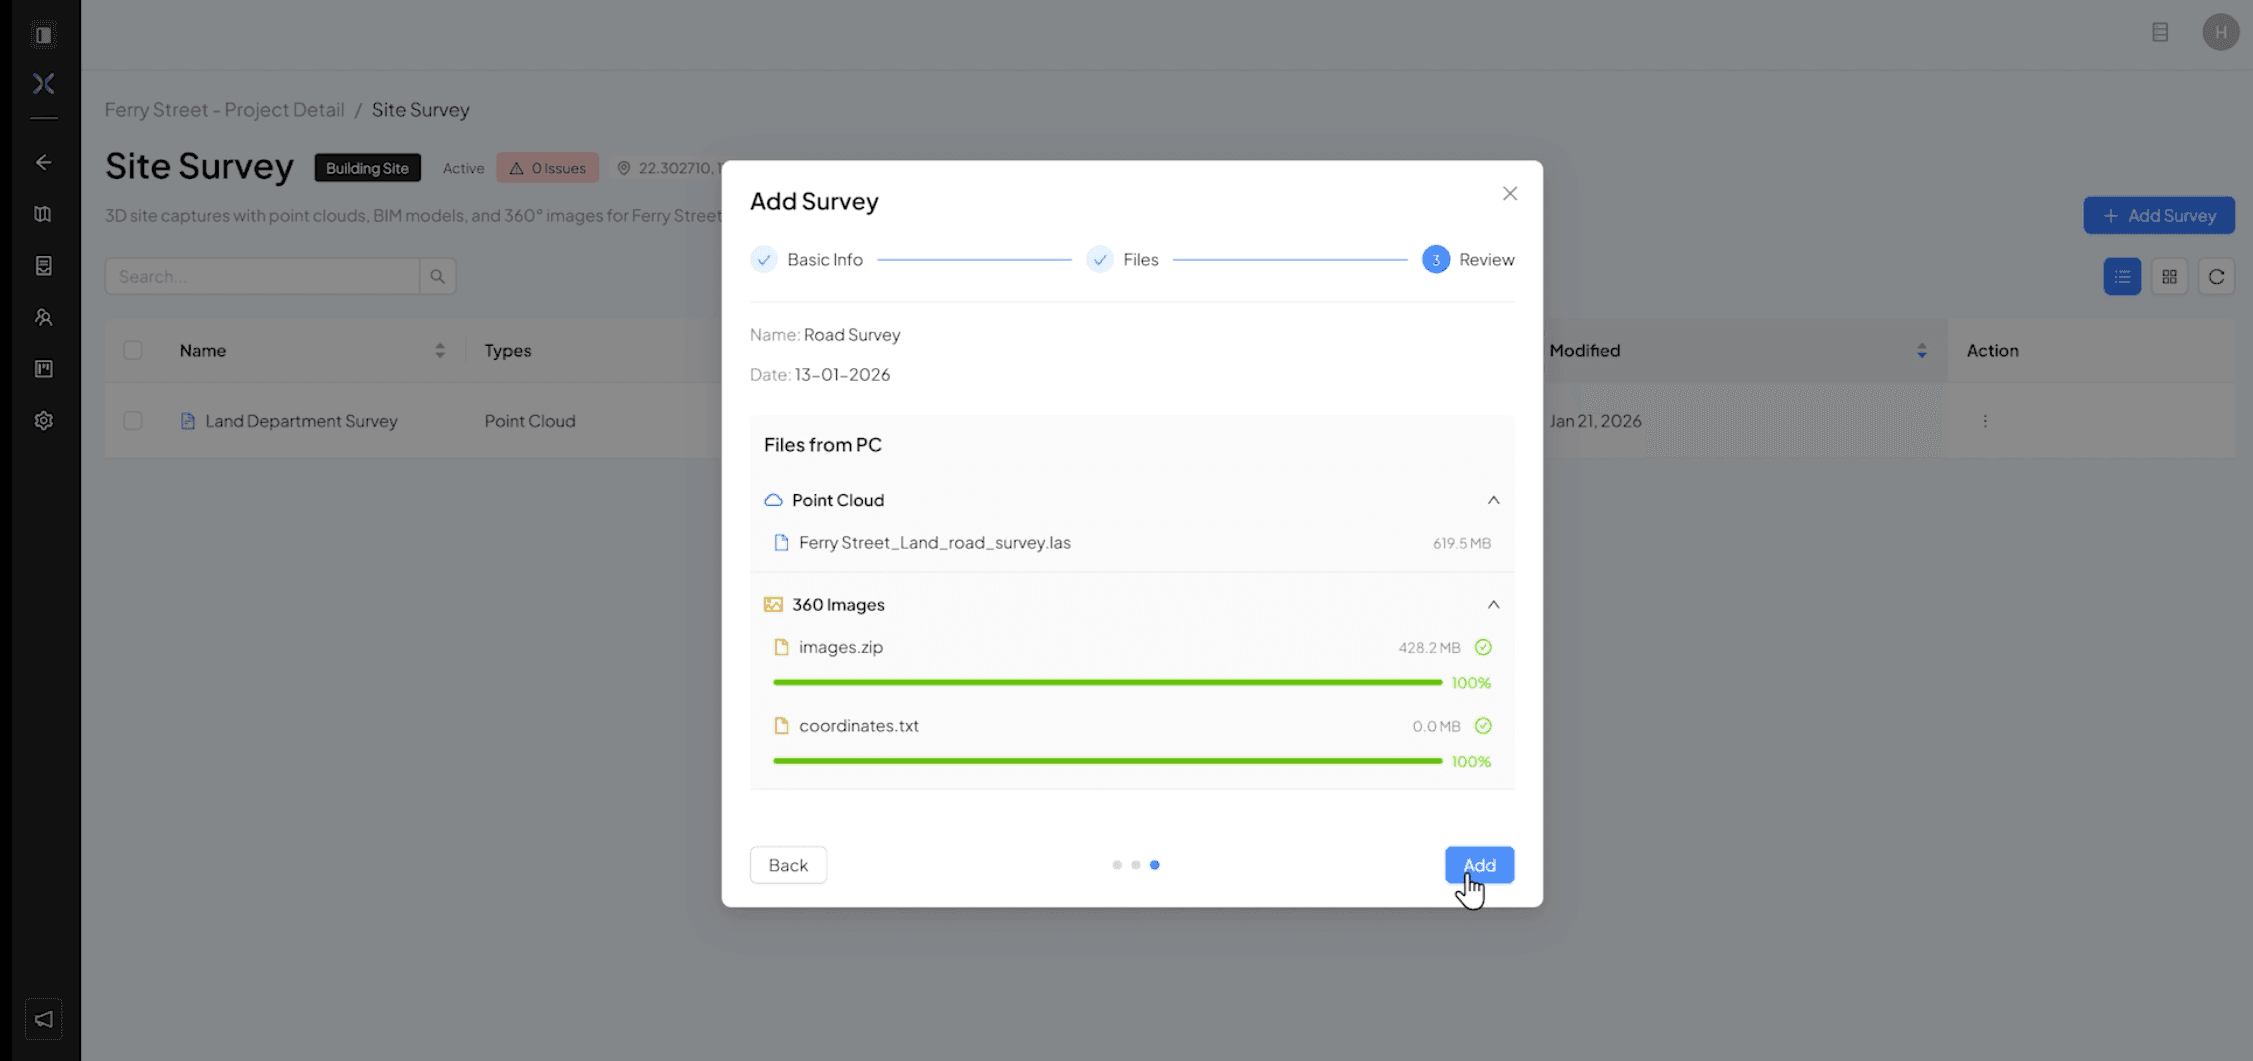
Upload new files from your PC or add files from your document management system if you have any other files uploaded to the portal, make sure you add the Images in the “360° images tab” and also the “meta data” for the files that has the coordinates.
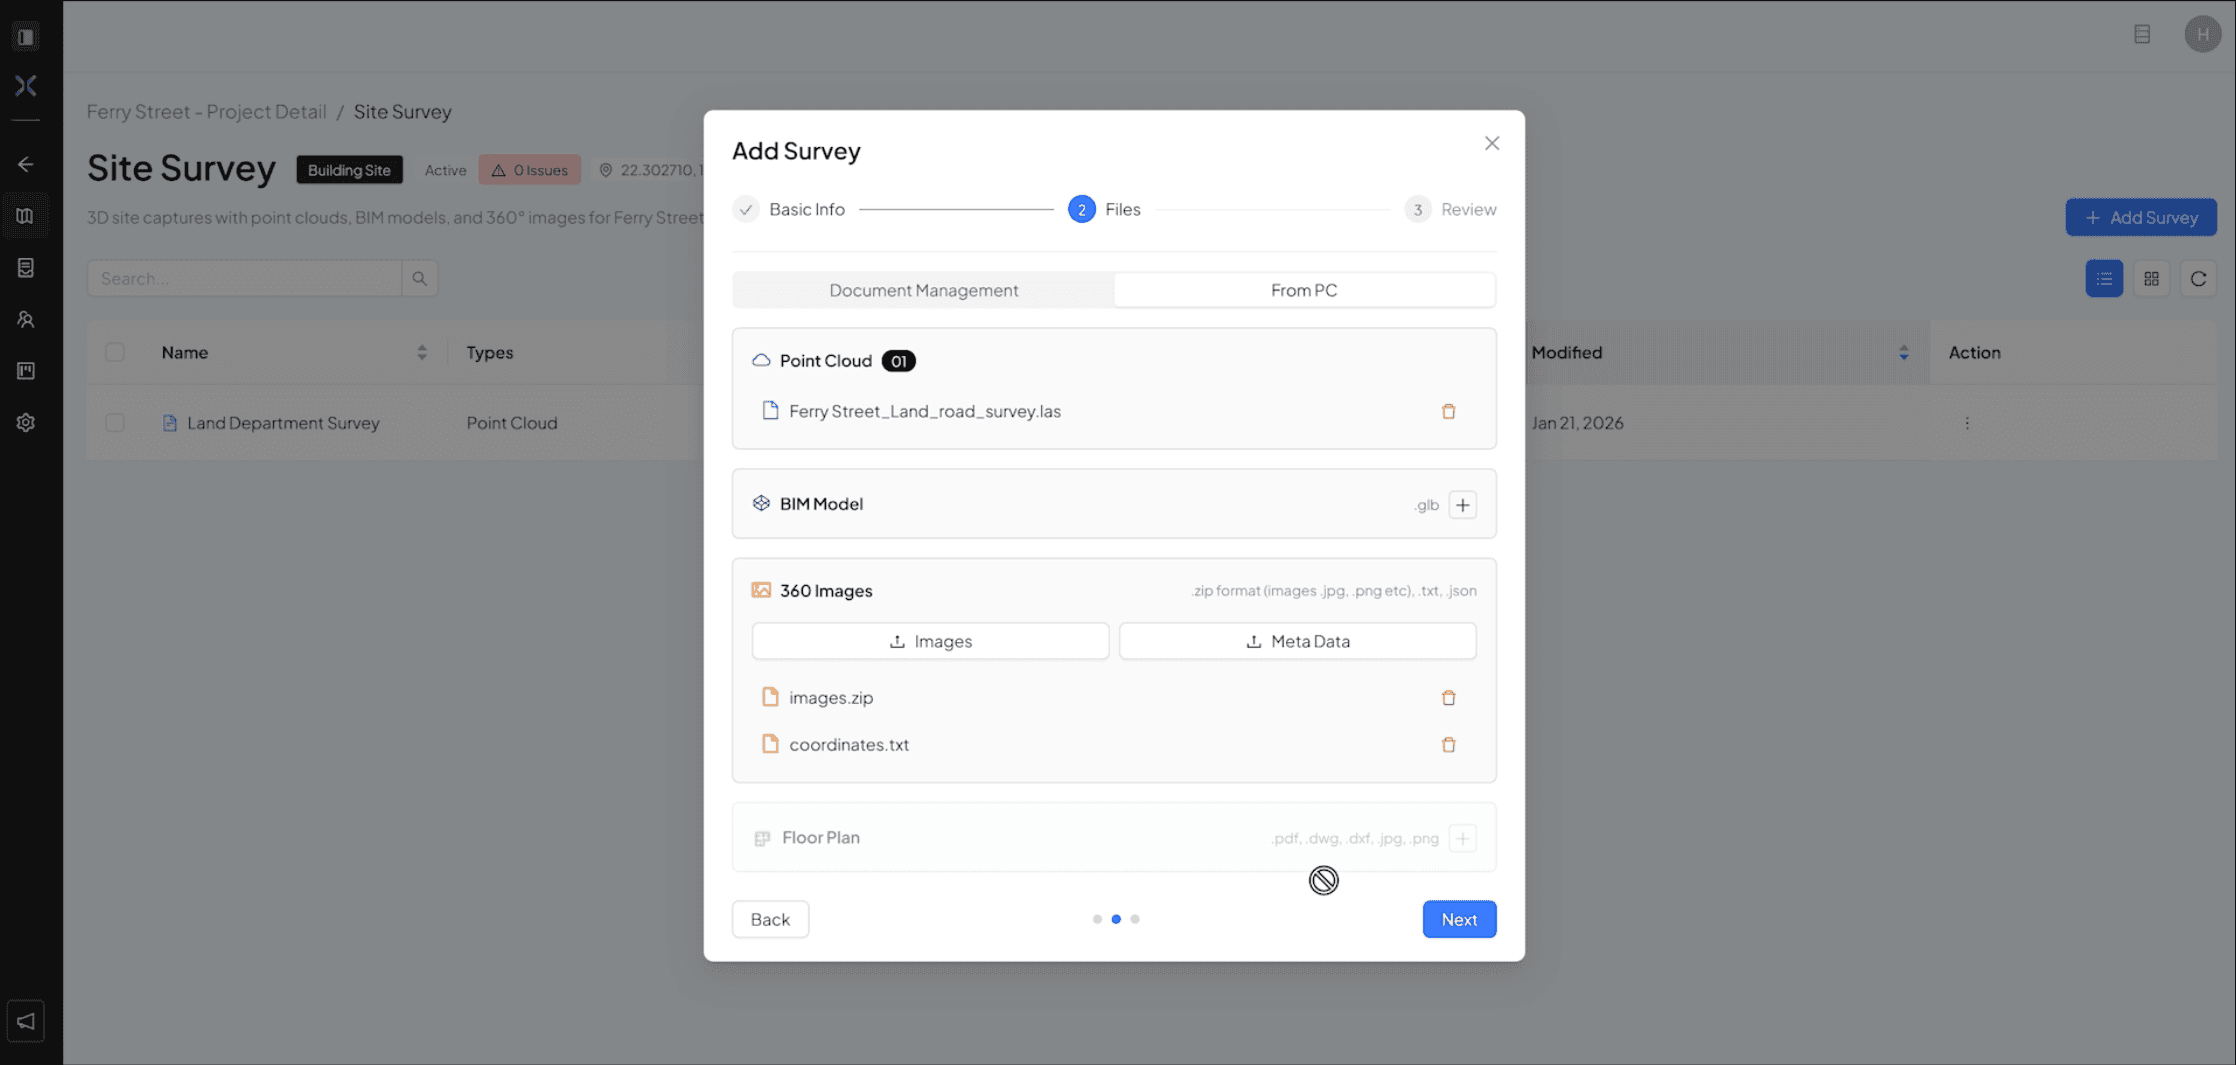
Click on “Next”, review the data and then press “ Add” to save the save
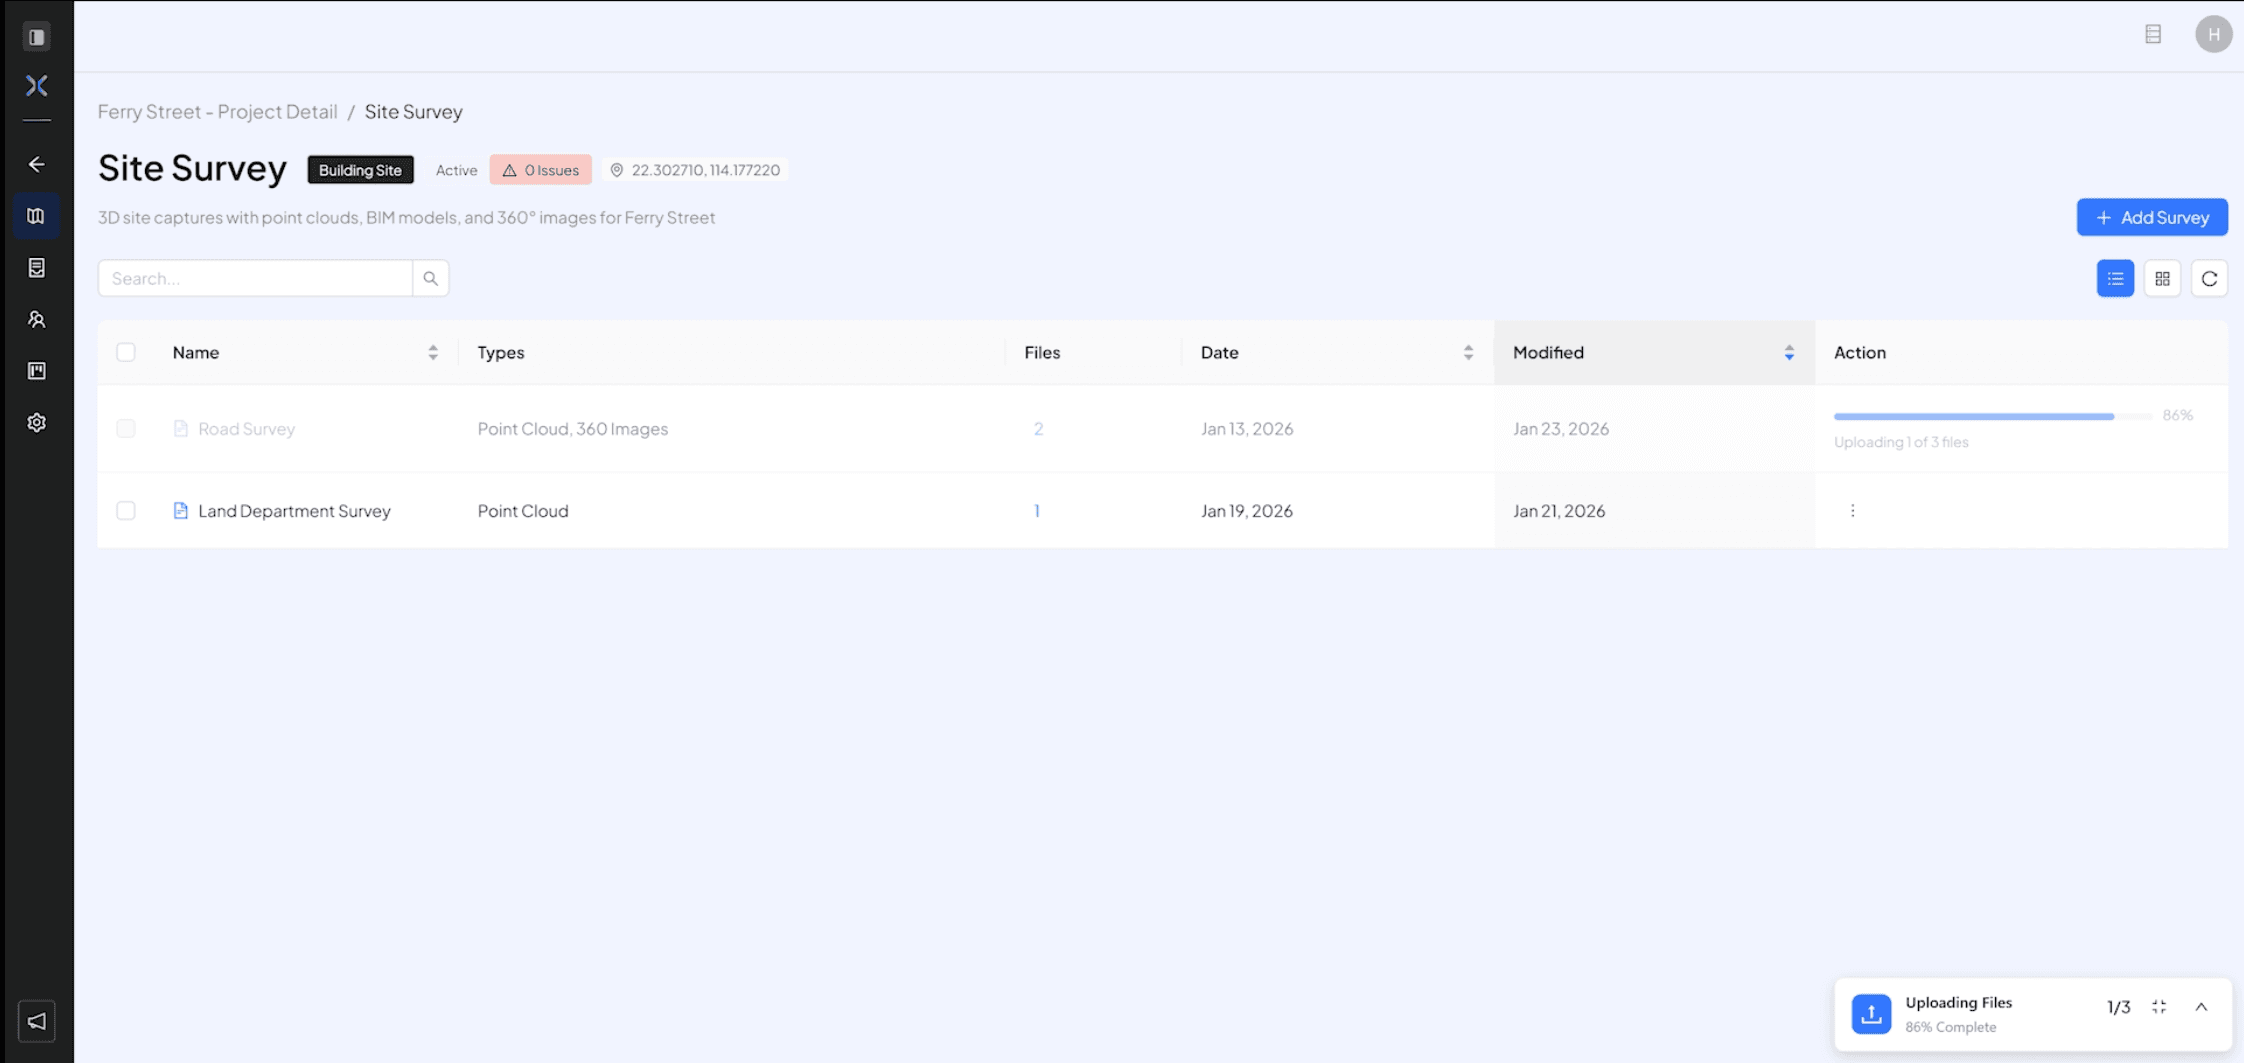
Wait for the files to be uploaded and wait for them to process
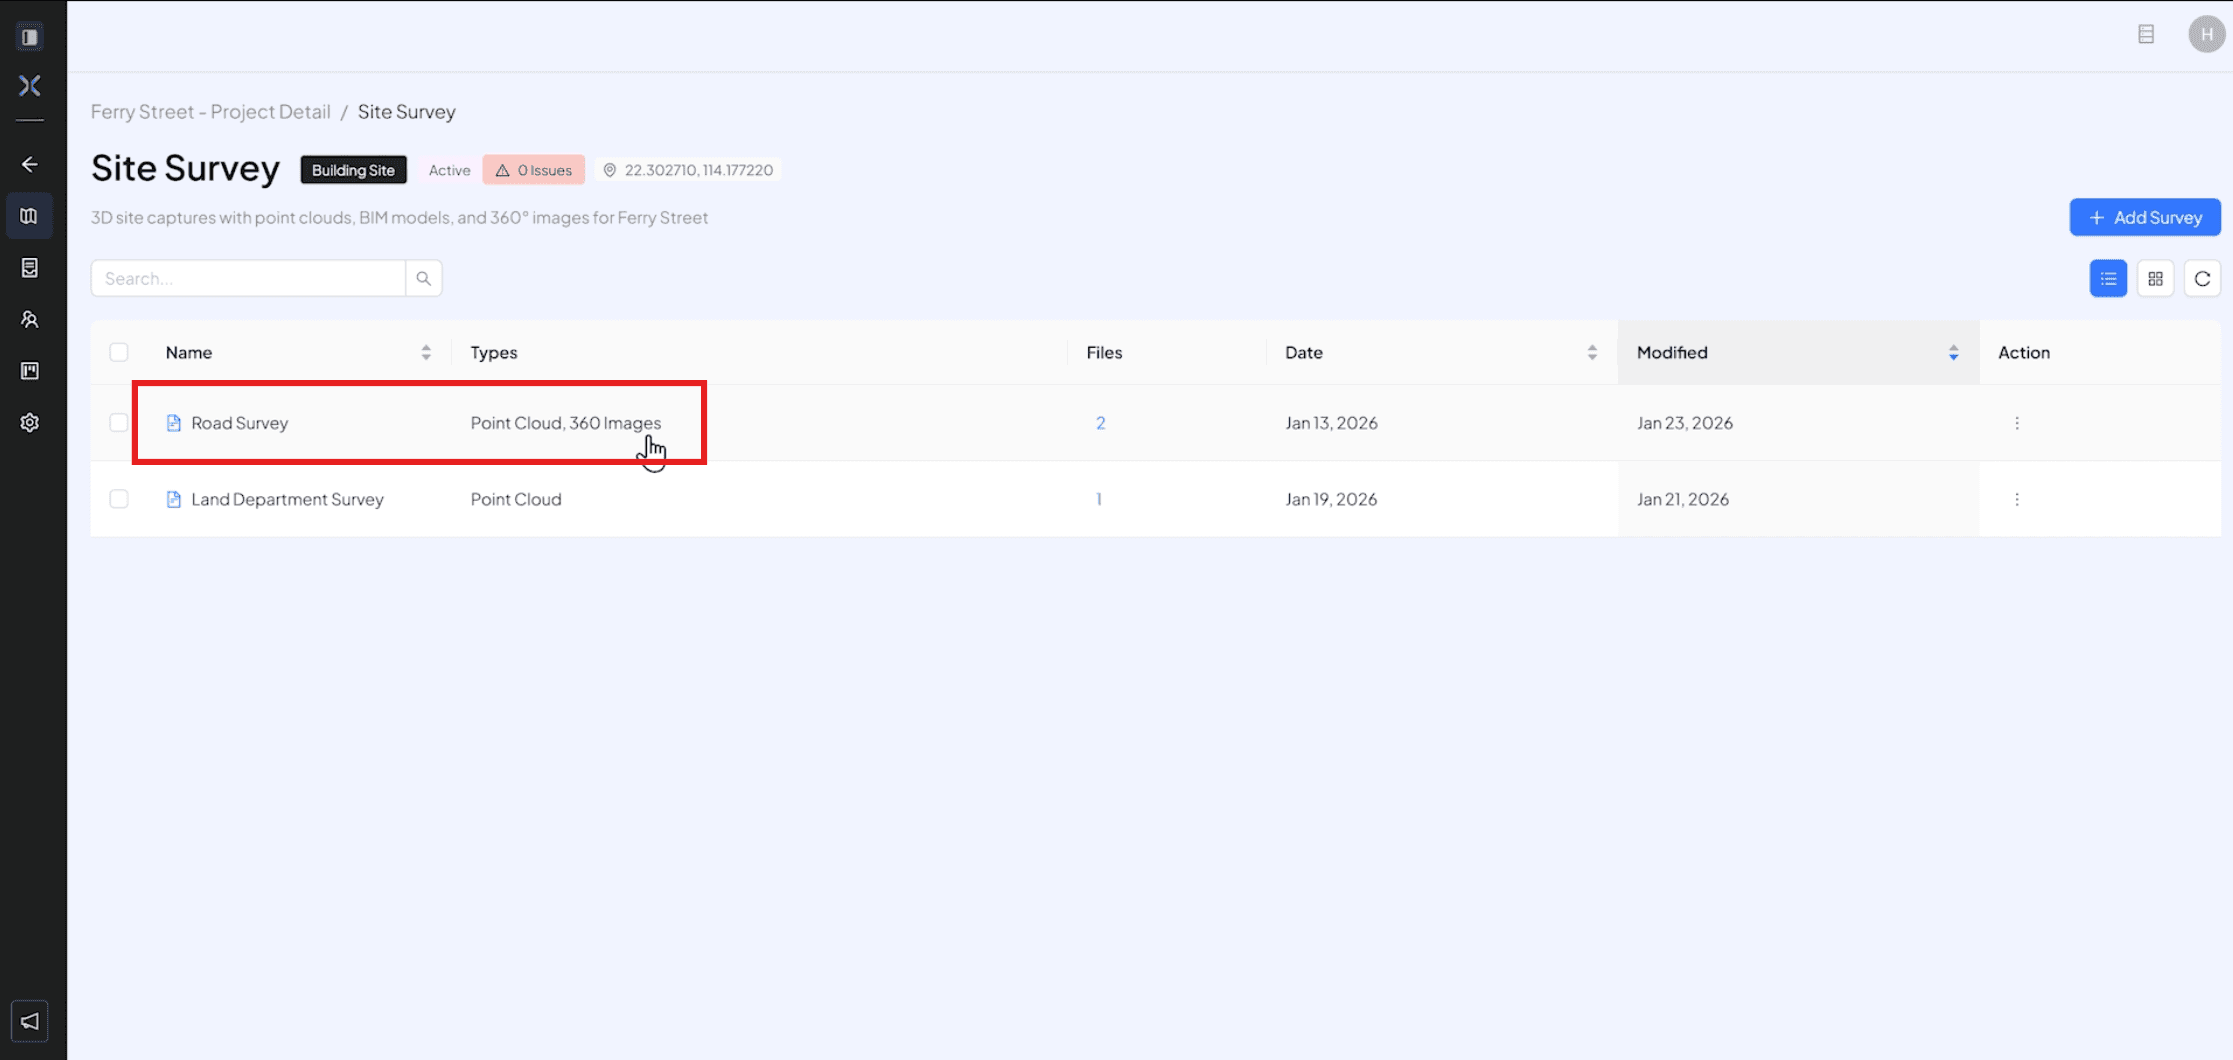
After the processing has finished, click on the survey you created to open it in the 3D viewer, Click the on the survey you just uploaded
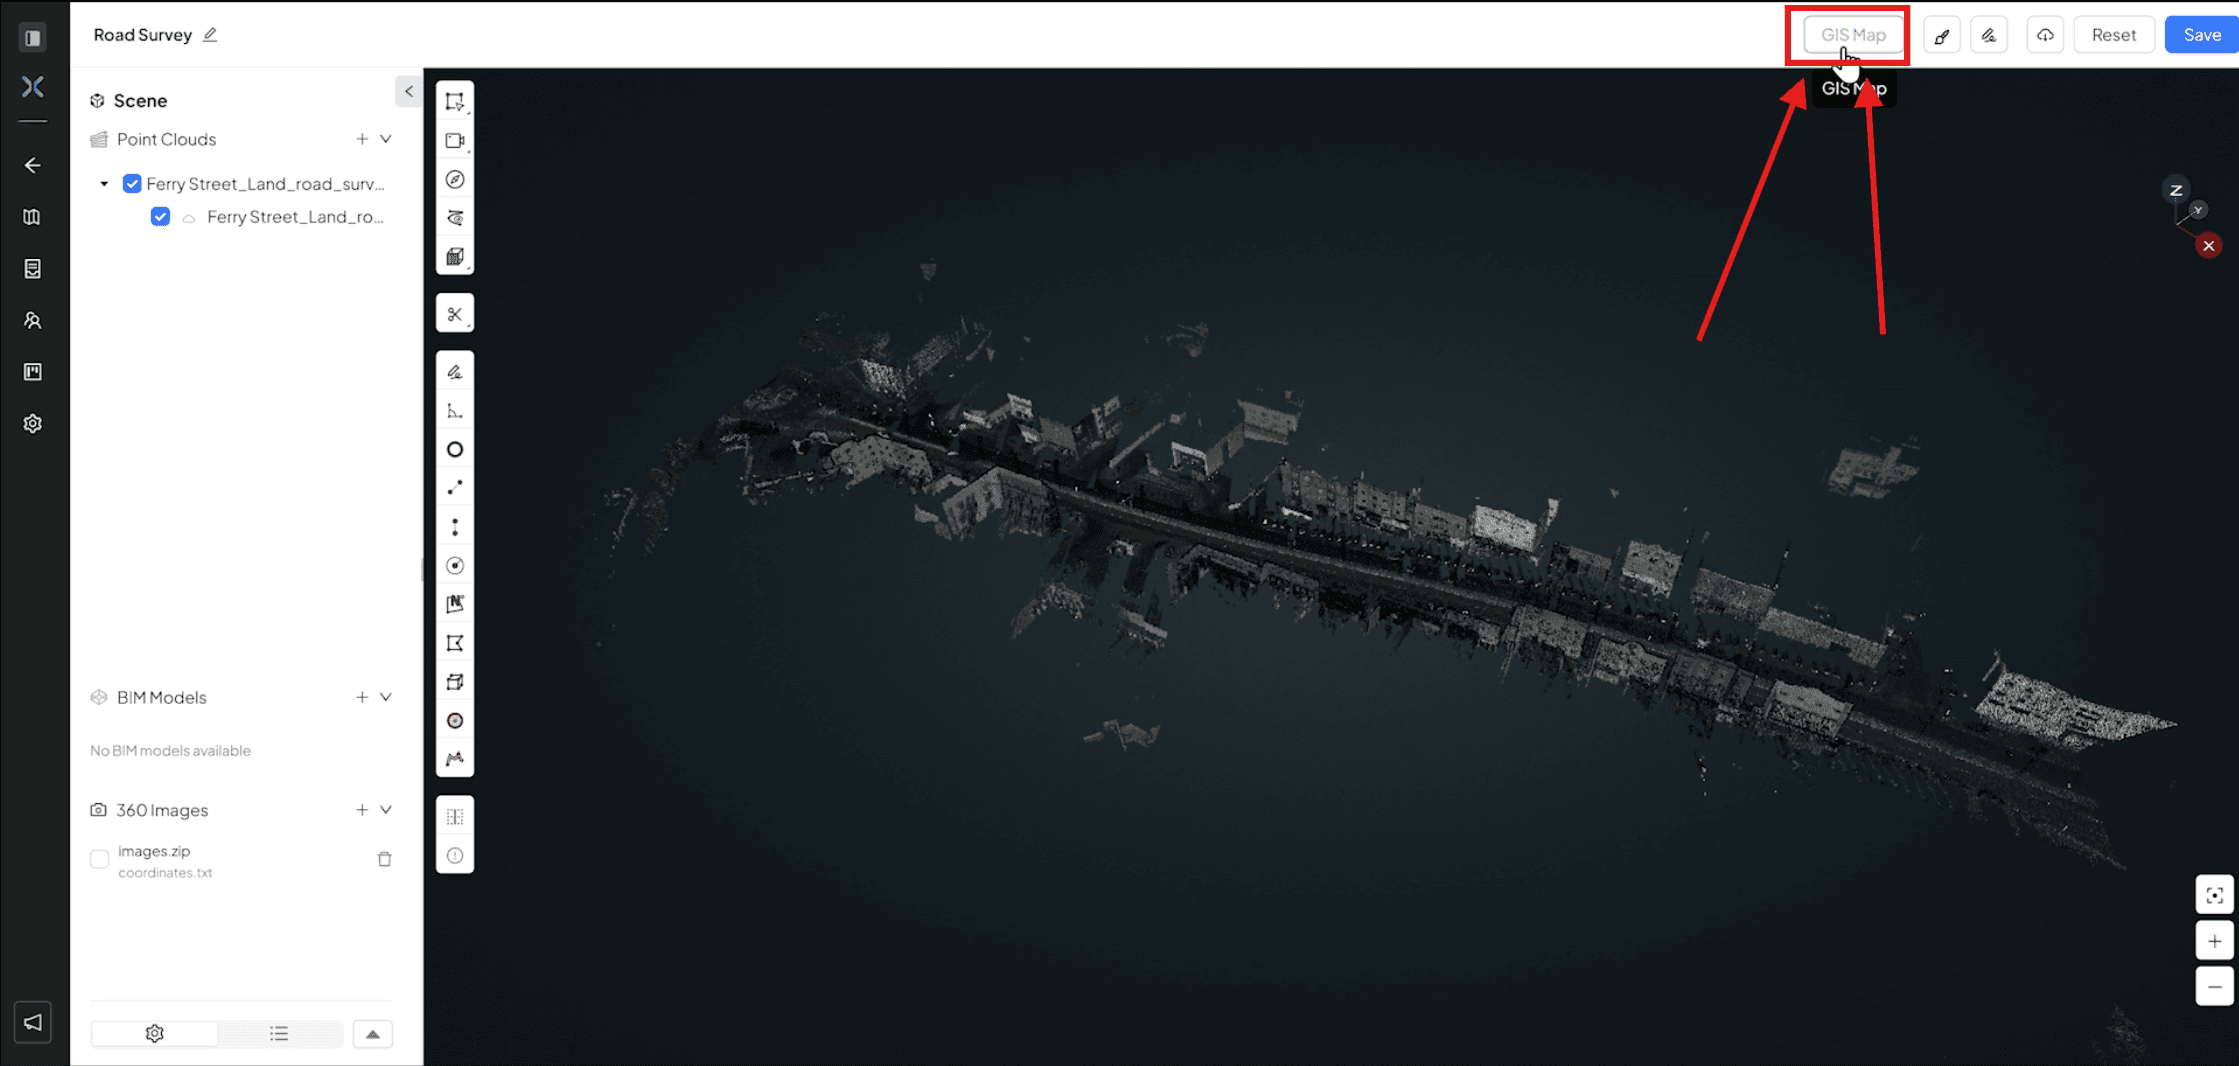
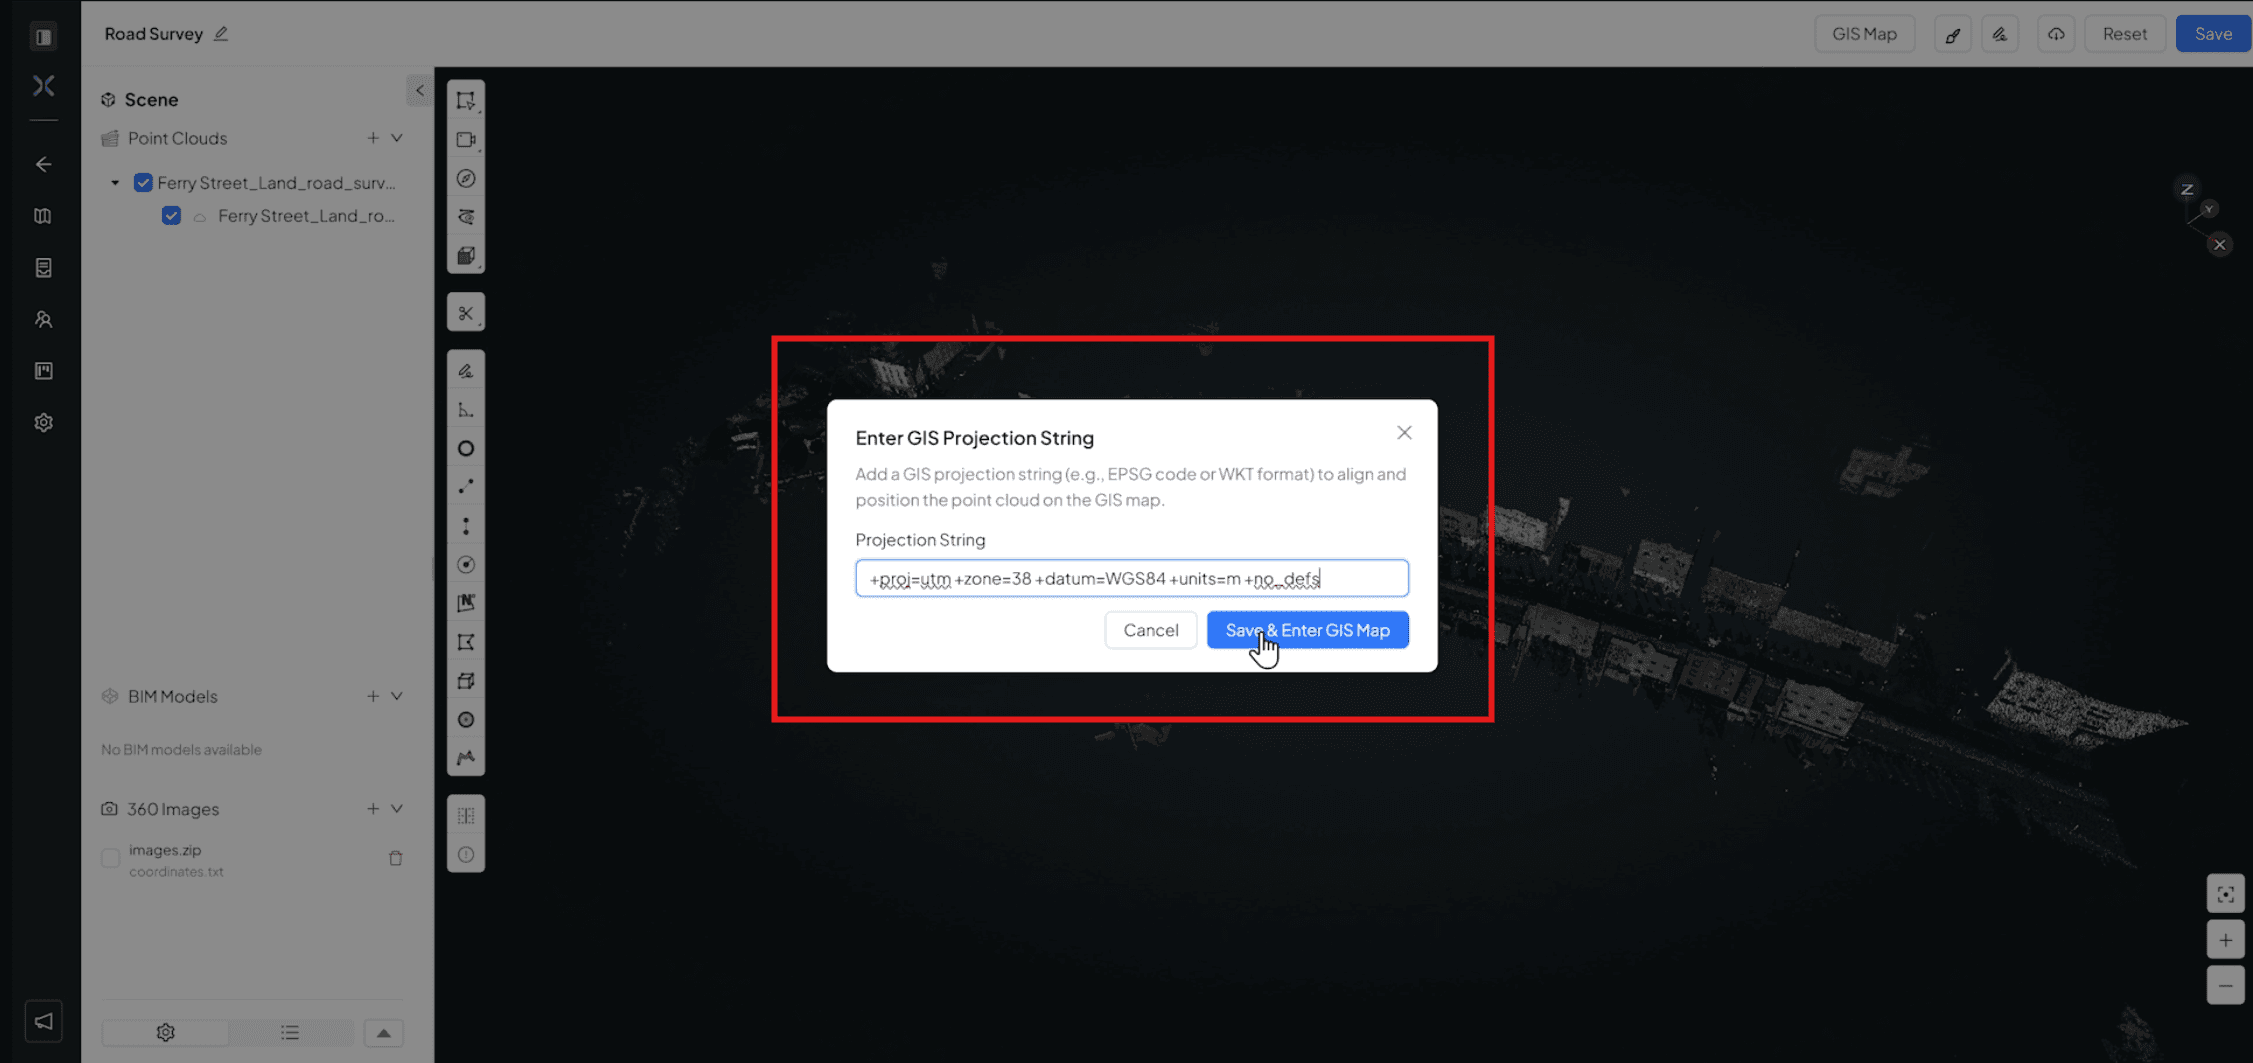
Click on the “ GIS Map” button
Add the GIS Projection String, so you can then align the the PCD/Images with a map for reference.
Press “Save & Enter GIS Map” button to load the map in the viewer portal
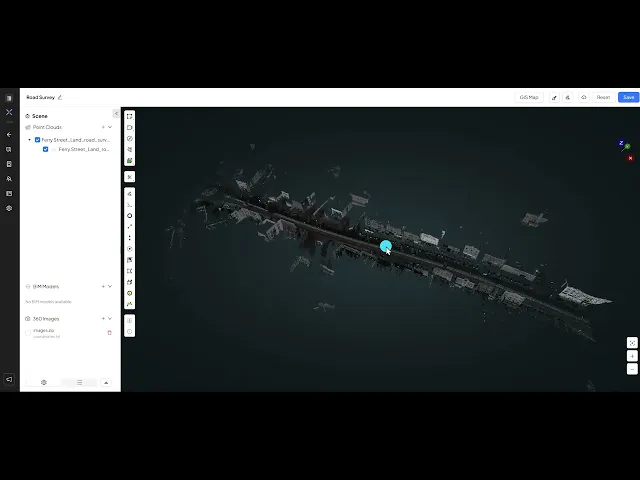
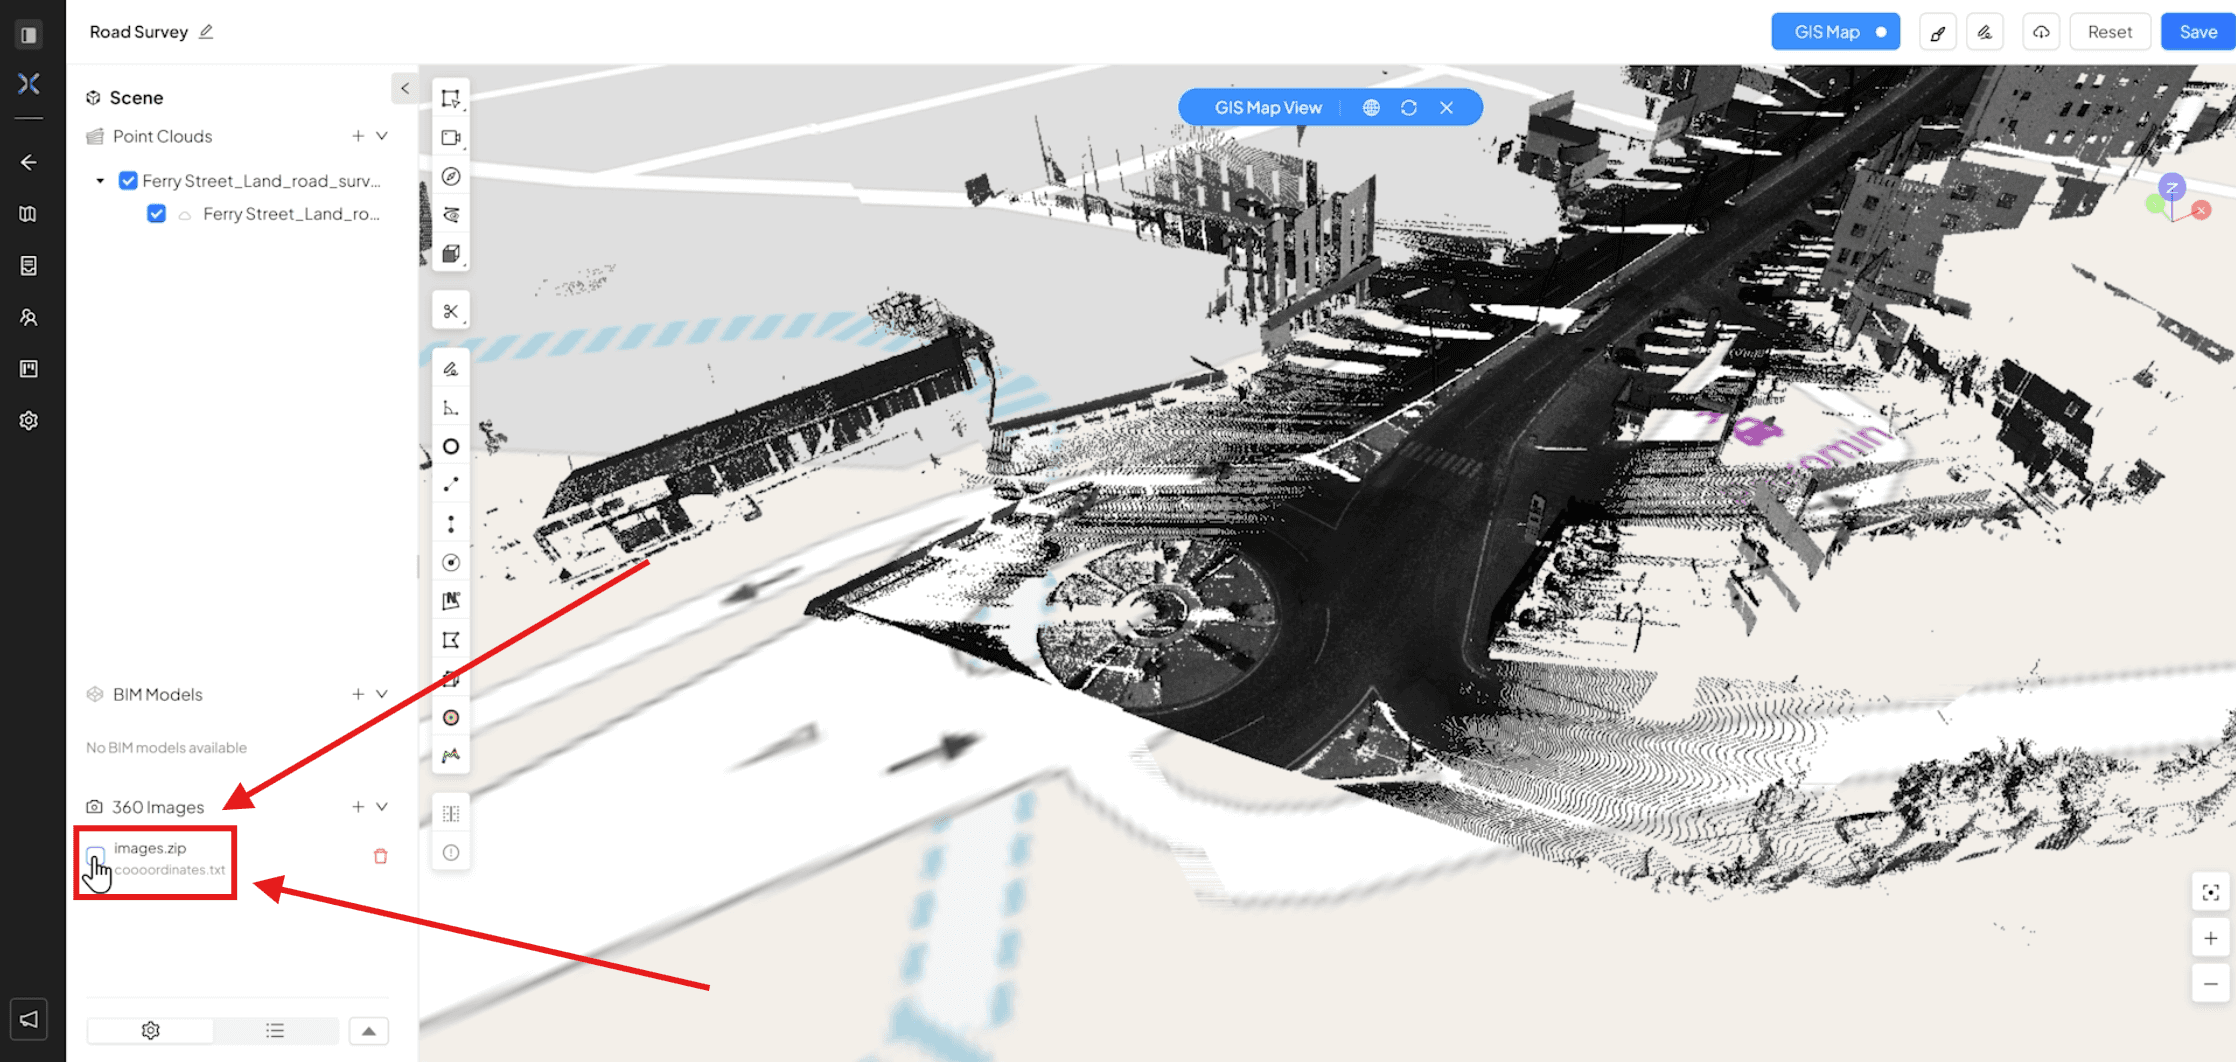
In the button left corner enable the check box in the “360 Images” for show the image in the viewport
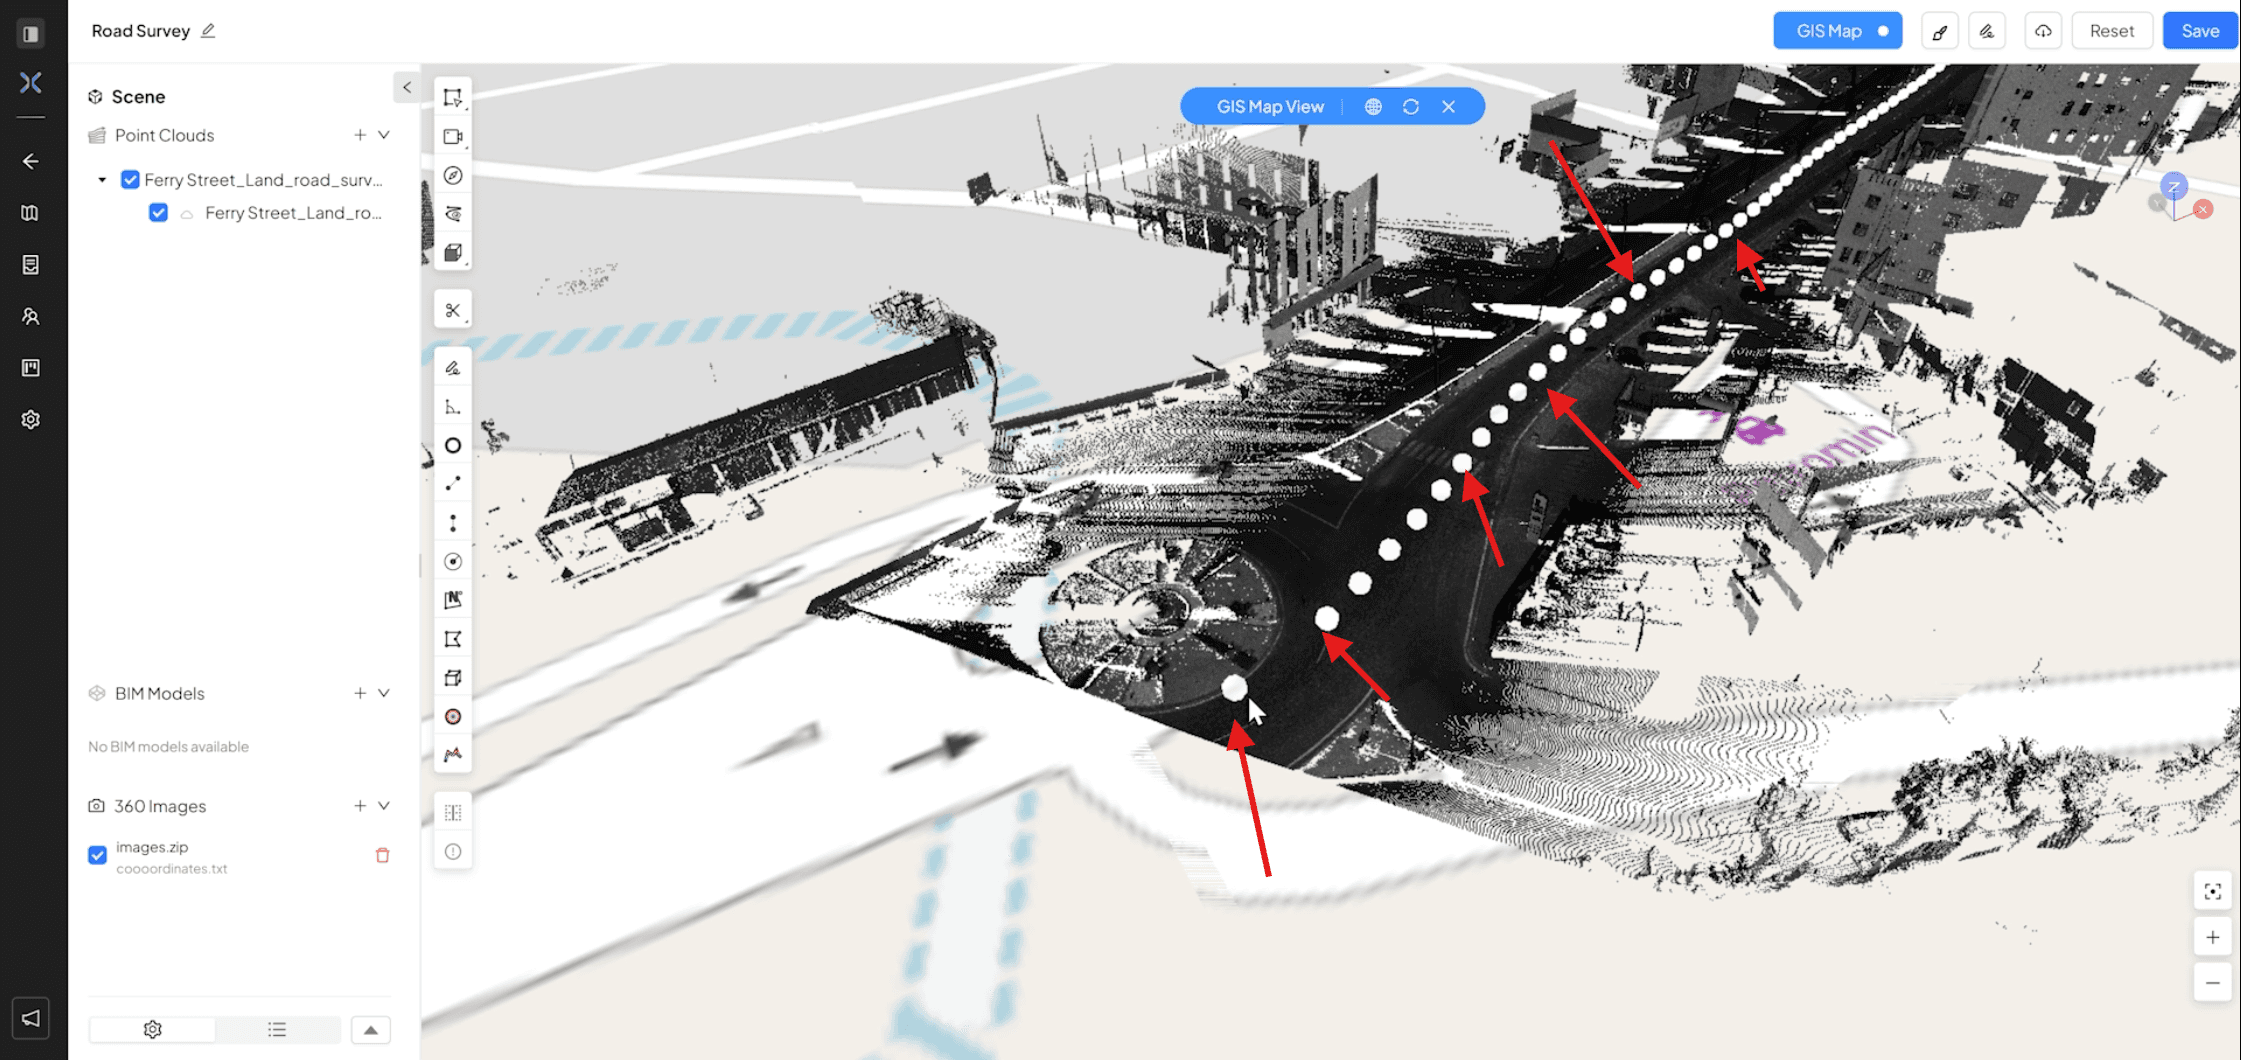
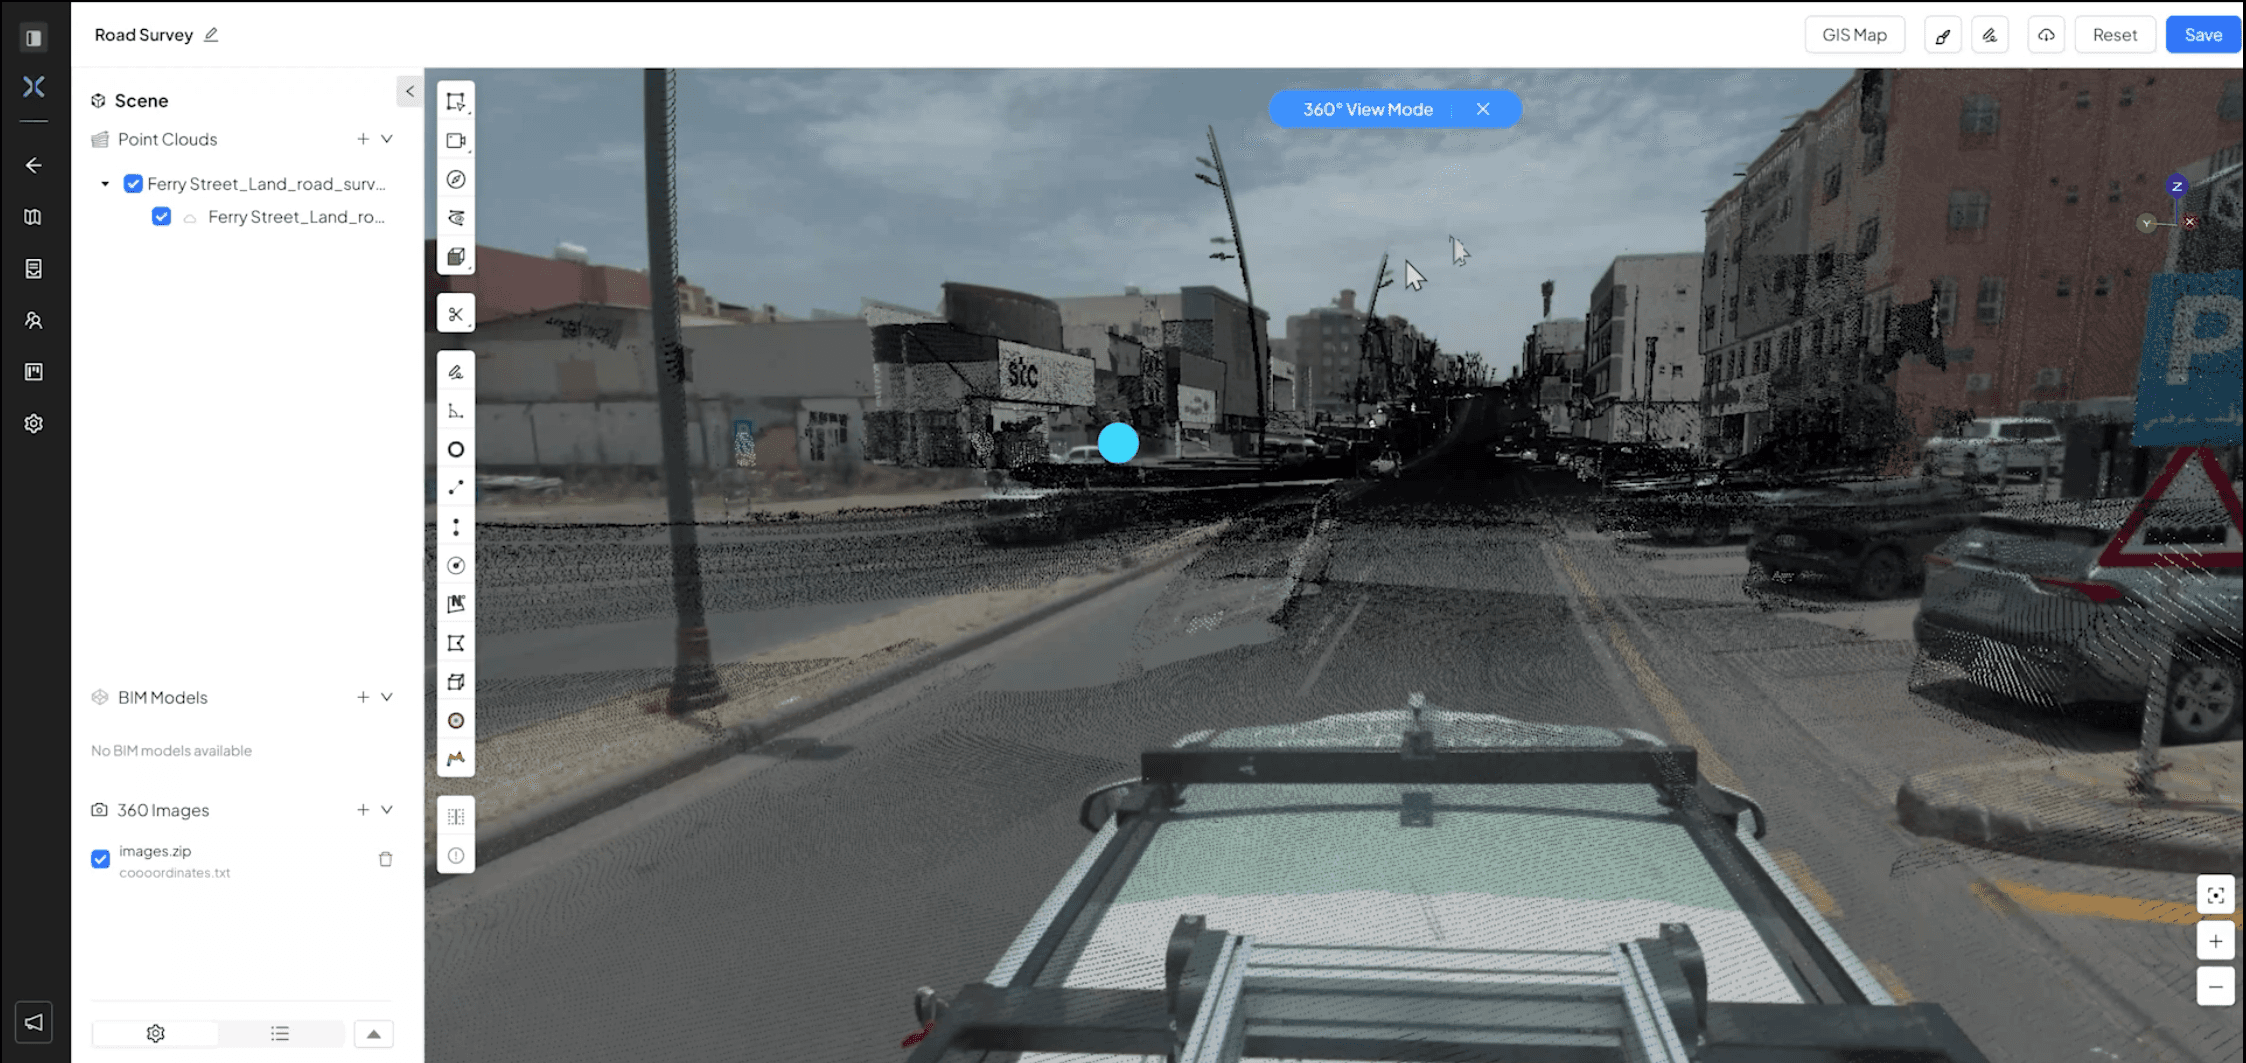
The small white circle will appear in the maps, showing the image taken at the specific spot, you can then click on any of those to see the images
Use the viewport navigation keys to move around the camera using the mouse (Left mouse button : rotate the camera , Right mouse button : Drag/Move , Zoom +/- : Scroll wheel)
Detailed Video of Steps above